
Managing Restricted Product Rules
Easily create, manage, and prioritize Restricted Product Rules in Shopware using the MasterFFL Rules Engine. Rules allow you to control checkout behavior based on products, categories, firearm types, states, and other configurable conditions.
Creating Your First Rule
Rules determine how checkout behaves based on factors like destination state, product SKU, category, or custom attributes.
A common example is preventing restricted products from shipping to certain states or requiring shipment to a receiving dealer.
Example Use Cases
- Block ammo from shipping to NY
- Require FFL transfer for firearms in all states
- Prevent checkout of restricted items such as suppressors when the customer resides in MA
- Automatically direct barrels or firearm parts to a receiving dealer in CA
Creating a Rule
There are two ways to create a rule. You can add a rule from our selection of commonly required pre-built templates, or you can configure your own rule.
First, we will explore how to add a rule using our pre-built templates.
-
Open the Master FFL app inside Shopware.
-
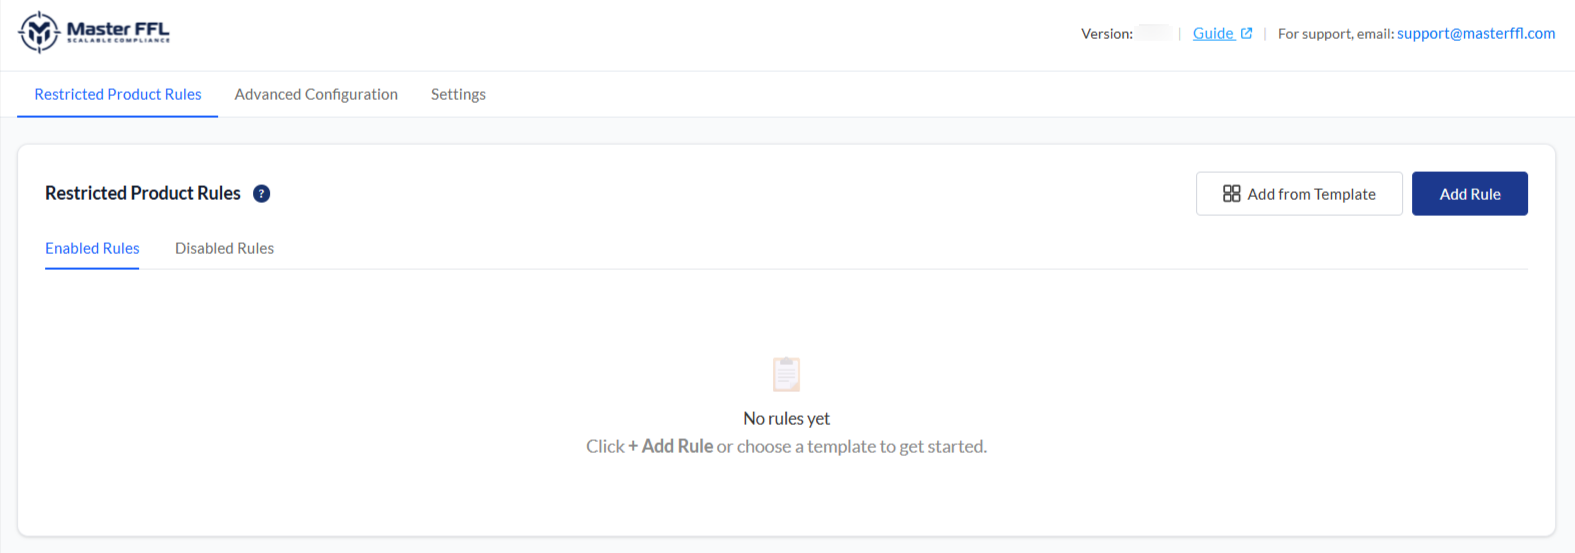
Ensure that you are on the "Restricted Product Rules" tab, and click "Add from Template"
-
Choose a rule template that fits your needs.
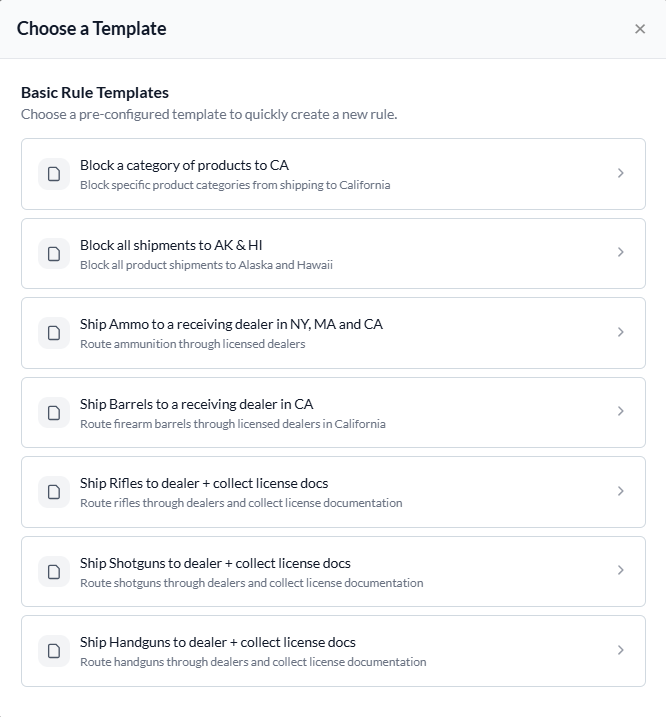
- For this example, we will choose "Ship Rifles to dealer and collect license documents". As seen in the screenshot below, this will pre-populate certain fields based on your selection. The following fields were pre-populated in this instance:
- Rule Type: "Require selected products to ship to an FFL in this region"
- Select States: "Federal" (Rifles are federally regulated items, therefore all states must be in compliance.)
- Product Match Type: "Category" (Rifles will require you to select whichever product category contains your Rifle firearms).
- "Run transfer workflow and acquire license documents" is auto-selected, and cannot be unchecked. Rifles are federally regulated and therefore require the transfer workflow to be selected.
- "Item Type for Transfer" is automatically selected to match Rifles. "Item Sub-Type for Transfer" is a helpful additional field to classify your firearms more accurately. For instance, in this case you may select "Rifle, Bolt Action" as your item sub-type. This field is optional.
Notice that required fields that you need to fill are highlighted green.
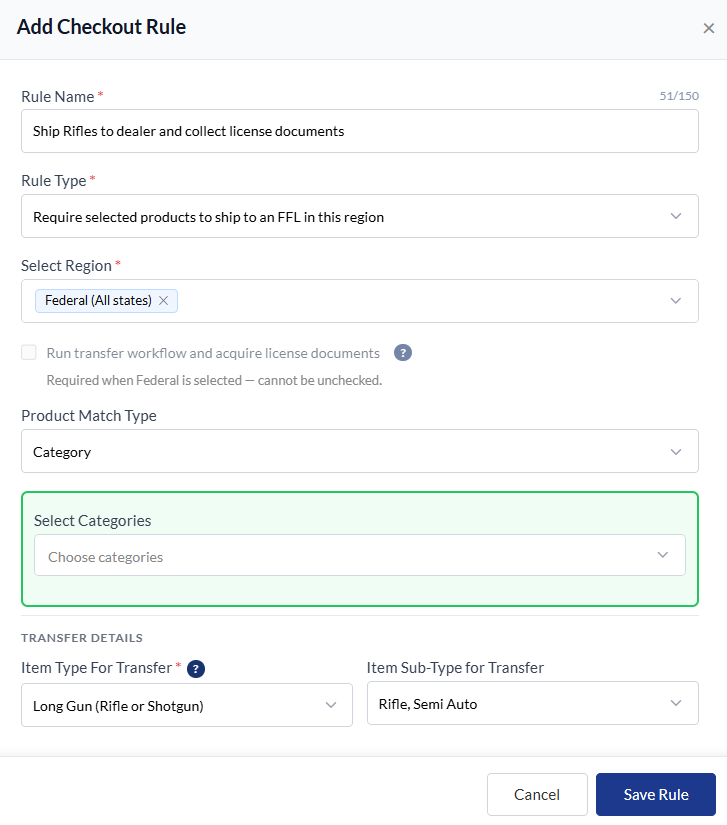
To complete this process, you will select the category which contains your Rifle products, and select "Save Rule".
Please note that the "Create an Exclusion" feature will be covered later in the tutorial.
Add a New Rule
Configuring your own new rule is very similar to using a template. The only difference is that you will not have pre-filled fields when you open the rule creation form.
-
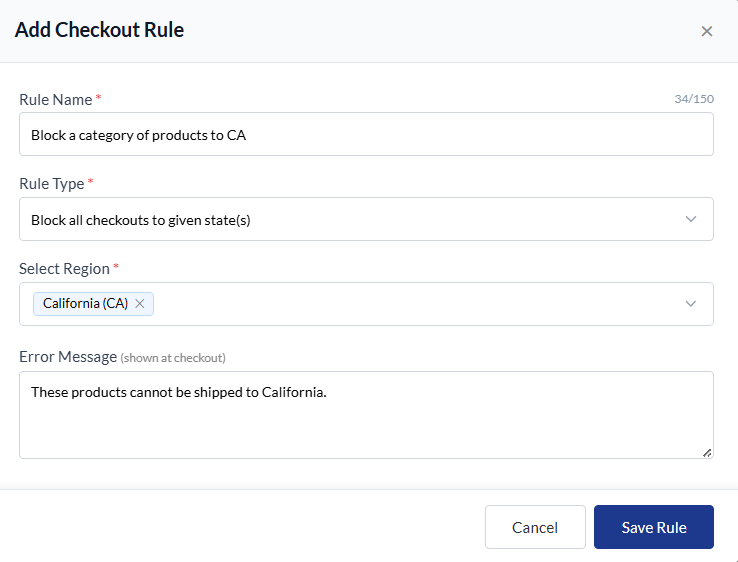
First you'll need to add a name for your rule.
-
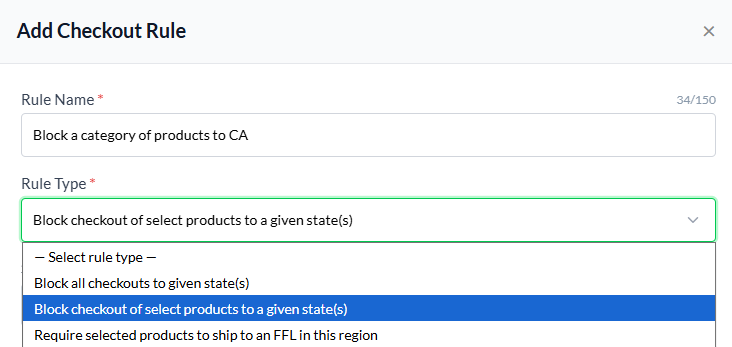
Second, you'll select the type of rule you'd like to create. In this case, we're going to simulate blocking all checkouts to California and New York. we will select "Block all checkouts to a given state(s)"
-
Next, we add the states that we'd like to exclude, and the messaging that we'd like to be shown to the customer:
-
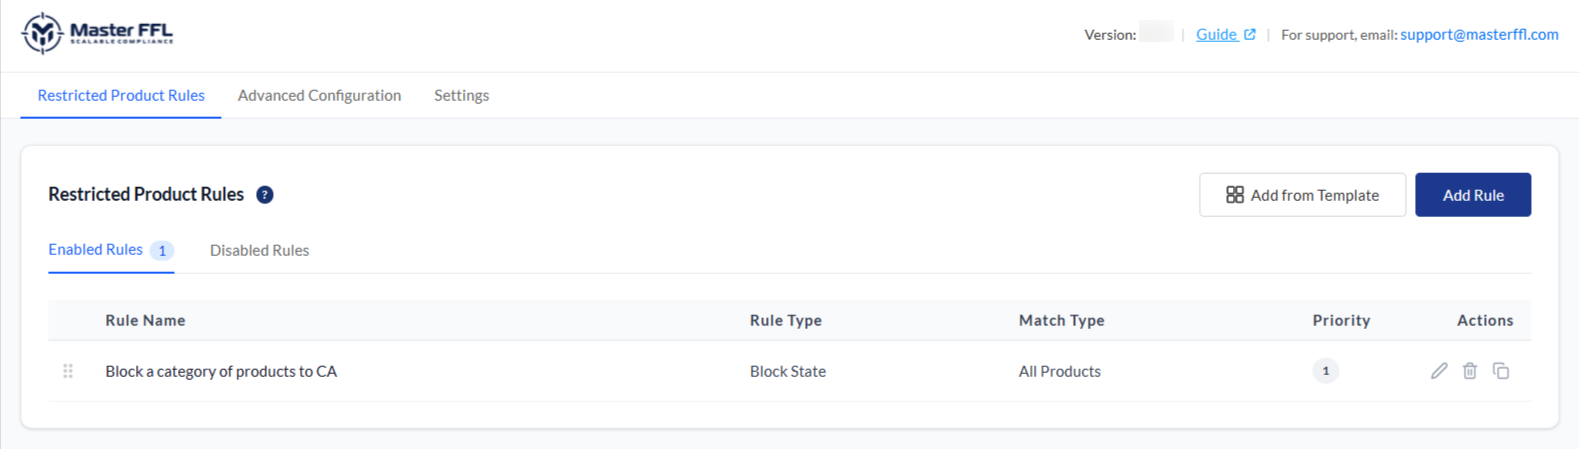
Once you've completed your configuration, click "Save Rule". You will see your new rule populated in the "Restricted Product Rules" tab.
Editing, Disabling, and Deleting an Existing Rule
-
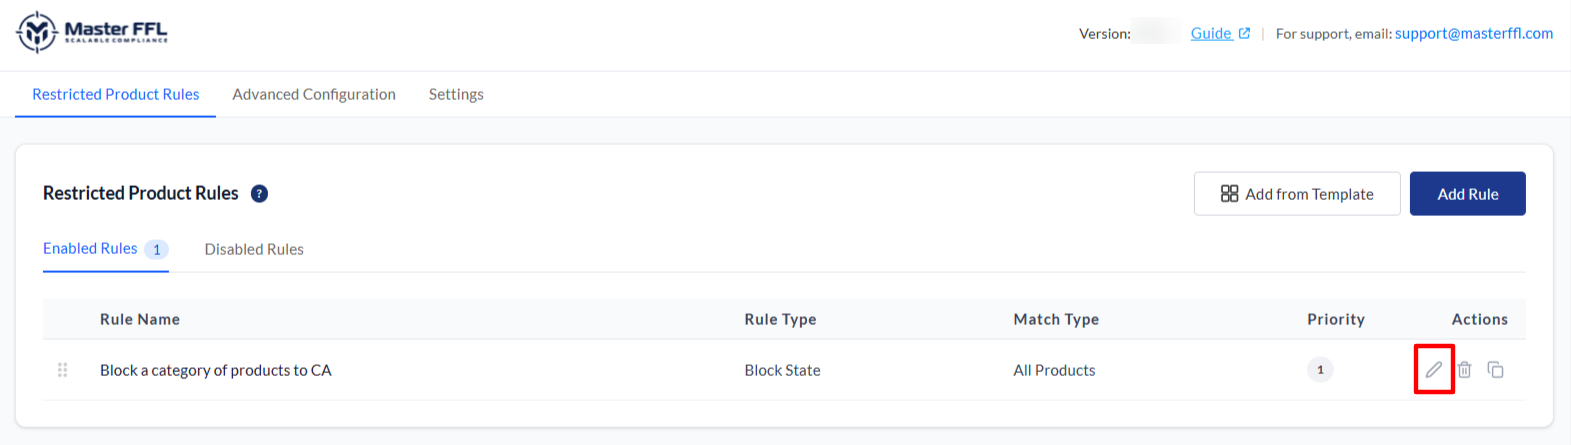
To edit an existing rule, click the pencil icon located in the right most column of your rule.
-
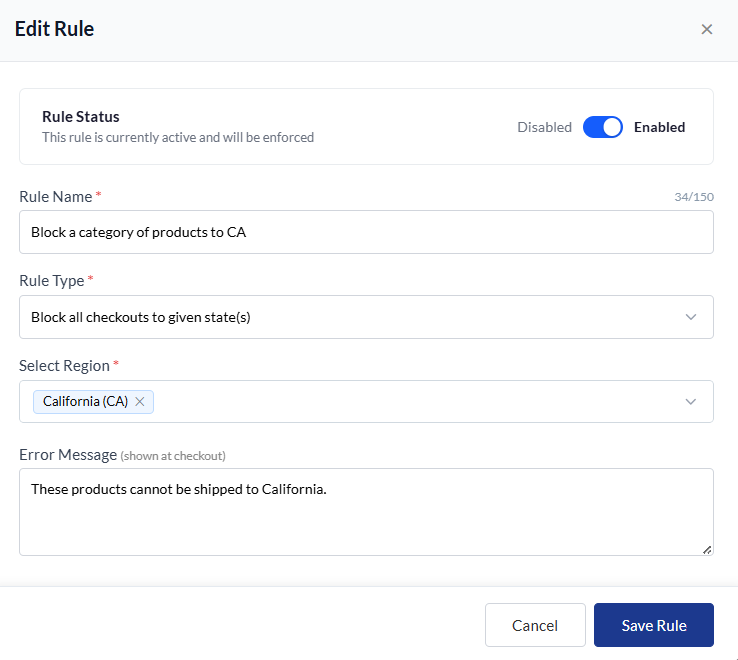
You will then see an edit dialog appear:
-
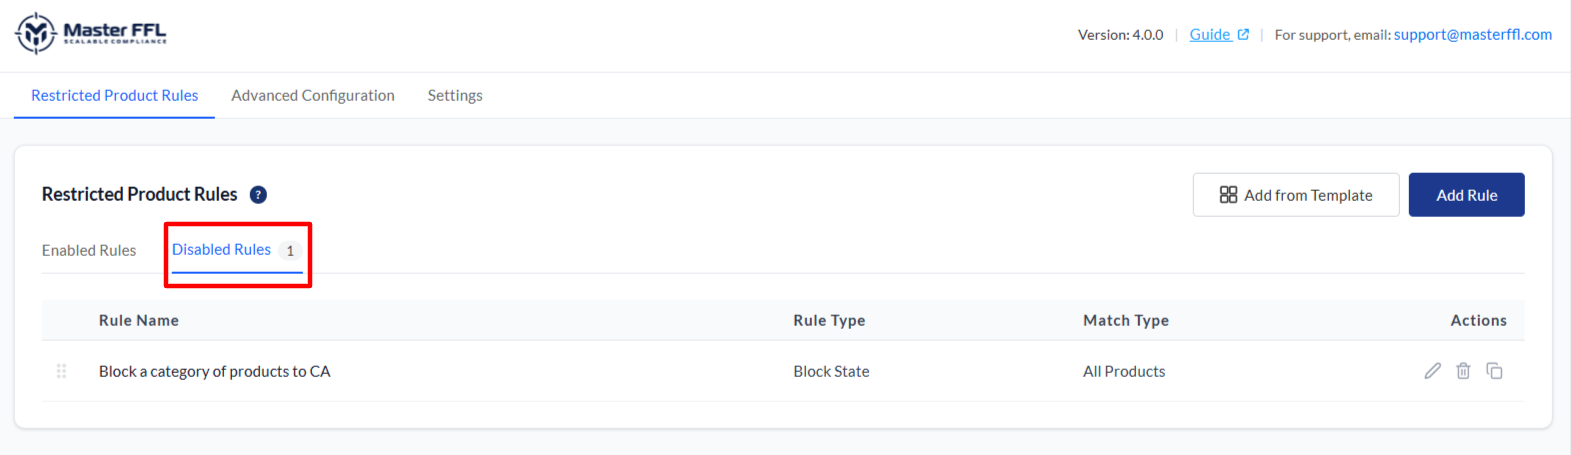
From here, you can choose to either edit the rule configuration, or you can disable it. To disable the rule, simply toggle the Disabled/Enabled switch at the top right of the dialog. The rule will then be moved to the "Disabled Rules" tab, and will no longer be applied at checkout.
Create an Exclusion
There may be instances where you have a category in your catalog that has both restricted and non-restricted items. When you do not want your rule to apply to specific items, you can exclude those items using the "Create an Exclusion" feature.
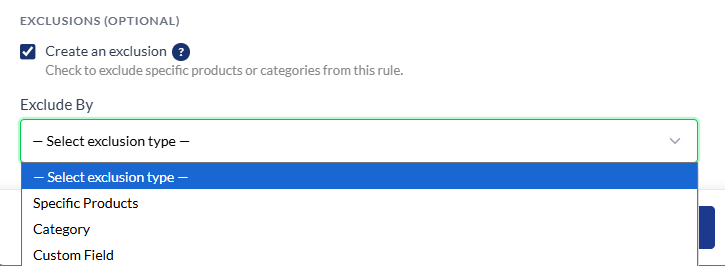
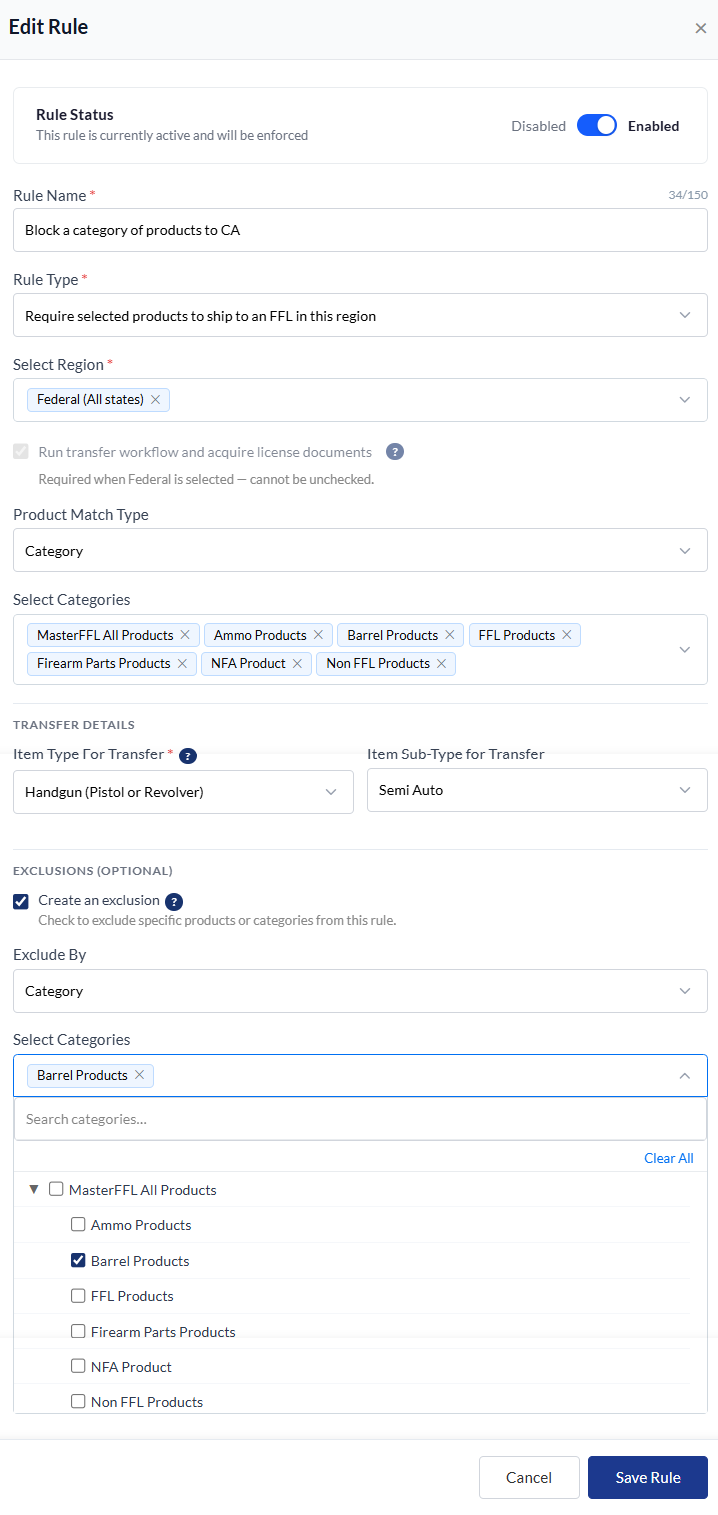
Let's assume that we have scopes in our parent Rifle category which we would like to exclude. In this case, we would follow these steps:
- select "Create an Exclusion".
- Select "Category" under "Exclusion Match Type"
- Select the Scopes category to be excluded from the rule.
Updated 3 months ago